Walkthrough Silent Hill PSX PS1

Wanna play Silent Hill? Click Here to download ISO High Compressed. Untuk walkthrough berbahasa Indonesia Klik Disini
IntroductionColor legend |
00. Silent Hill Arrival"Cheryl? Is that Cheryl!?" Starting the game for the first time, a cutscene will play of Harry stepping out of his Jeep – bad parking job, by the way. Afterwards, Harry thinks to himself about the town. When you can play, follow the road forward for a bit and Harry will comment, "Footsteps?" Cheryl is seen in a cutscene and she crosses the wide road. In the depths of the fog, follow her down the street, and Harry will notice her in an alley. Continue your pursuit down the long alley, and you'll hear the sound of a gate near the end, which Cheryl goes through. Do the same and move through the left gate at the end of the alley. Upon the terrifying sight, hope that mess isn't Cheryl, and follow the pathway, hearing a siren. Adapt to the twisting camera angle and move around the corner to Harry's right. Follow the strangely disturbing pathway to a gate and go through it. The area is very dark for some reason – move forward a bit and Harry will light a flare. Follow the darkened hallway with your light source around some corners and past a broken wheelchair. Near the end of the path is a bloody stretcher – what the...? Take the right path and follow it over several streaks of blood and around a corner. Feeling apprehensive, embrace yourself and walk the rest of the pathway for a cutscene. Demon Children will appear in the area and Harry has no weapon to fight with. It is inevitable to live through this part since the demons won't allow you to escape – they'd rather you sliced and diced. |
01. Old Silent Hill"What's that? Huh? Radio? What's going on with that radio?" Harry soon awakes in a cutscene inside a Café. This is where you will start in a Next Fear game. Harry is accompanied by a Police Officer, Cybil Bennett from Brahms, the next town over. Cybil hands you her Handgun in the cutscene, and later leaves to call in reinforcements. After the civil conversation, Harry will comment that he should look for something useful before leaving, if you try to exit. Move towards the right section of the Café counter to find a Health Drink, a Flashlight, and a Residential Area Map. After the view change, move to Harry's right to find a notepad, which is a Save Point. At the other end of the counter is a Health Drink and a Kitchen Knife for a weapon. On the nearby table is a radio but Harry is convinced that it's broken. Now you should be ready to leave. Try to head out the front door for a cutscene. After Harry's humorous quote about the radio, an Air Screamer blasts through the glass, knocking Harry to the ground. Enter your inventory and equip the Handgun. Shoot away at the flying demon – it should take only six shots on Normal. Harry now feels that the radio could be useful (and so should you), so examine it to get the Pocket Radio. Now you're finally done here, so exit the Café. Once outside, Harry suggests that he should check the alley from before again, and marks it on his map. For a start, head north on this road, which is called Bachman Road. Just past the Cafe on the east side of the road are two packs of Handgun Bullets on a bench. Checking your map, you'll notice a Convenience Store at the northeast corner of Bachman and Finney. See if the store is of any convenience. Near the entrance of the store, with your Radio emitting static, is an Air Screamer on some bins. Ignore it and enter the store through the open door. Once inside, move towards the camera to find a Health Drink at the end of the top shelf. Move down the middle aisle for 2 Health Drinks on the right and left shelves respectively. On the right counter away from the camera is a Save Point, and a First Aid Kit is on a shelf further back. Exit the store when you're done. If the Air Screamer is out here again, quickly run away from it and head towards the Finney Street alley, moving west. Once in the alley, you may encounter another annoying Air Screamer, and further down the alley, three Groaner Dogs. Run past them and go through the left end gate. Follow the pathway to another Groaner – kill this one as it may cause some trouble in this small area. Continue past it and go through the gate at the end of the path. In this area, grab the 2 packs of Handgun Bullets on the ground in front of Harry. Moving over to Harry's left, you'll find a note from Cheryl's sketchbook, "To school". So she must be at the school... Harry marks Midwich Elementary School on his map. Beside the note lies the Steel Pipe, however, it will only be here on Easy and Normal. Exit this entire alley to Finney Street. If the Groaners follow you to the street, use the Handgun to get rid of them. You want to get to Midwich, but if you go west, past an Air Screamer, you'll find that the road is destroyed. So head south down Levin Street, seeking another way to Midwich. If you stay on the right (west) sidewalk, you'll come up to two Groaners by a Doghouse. Deal with the doggies and then examine the Doghouse – Harry doesn't find anything interesting. Also, note the locked door at the house where the Doghouse is. Continue south on Levin Street, and head west on Matheson Street when you reach it. Well, this road is destroyed too. However, there are notes on the ground. "Doghouse", "Levin st." – apparently Harry didn't look well enough at the Doghouse on Levin Street. All the roads that lead to Midwich seem to be destroyed, so return to the Doghouse. Upon more examination of the Doghouse, a House Key is found hidden inside – take it. Now use the House Key to enter the house right here, through the single brown door up the steps. Once inside, a First Aid Kit is on the stand to Harry's right. Move into the dining room area, past a door that won't open, to find a Save Point, two packs of Handgun Bullets – one on the right table and the other on the left stand. In the kitchen you'll find a Health Drink by the stove. The far door in the area, leading to the backyard, has three locks on it, and it has a map beside it. The map has "Keys for Eclipse" written on it, and has three different symbols for what seem to be the locations of the three keys for eclipse, of course. No, you're not looking for a Mitsubishi Eclipse – you need three keys to open this door. Exit this house through the front door and start your scout. Since Harry copied the locations onto his map, look at them, and then for the arrow on Finney Street. Move north on Levin, and head east all the way to the end of the road on Finney, ignoring any enemies on the way. At the east end of Finney Street is an Air Screamer by a Police Car almost falling off the destroyed road. Kill the Air Screamer and grab the Handgun Bullets on the ground by the Police Car, then examine the open trunk of the car for the Key of "Lion". Okay, now head to the line in the narrow alley connected to Finney Street. Moving south in the alley, find the wide gate on the west side with "Off Limits" marked on it and go through it. Move to Harry's left to find the Key of "Woodman" beside a blood dog head. It looks like some sick person was playing Basketball with this dog's head... Also grab the Health Drink on the garbage bin to the left. Exit this area back to the alley and head towards the circle on Ellroy Street. Head south down the alley and continue south to enter a small alley past Matheson Street. Move past the Air Screamer and grab the Handgun Bullets x2 at the end of the alley on the right ground. Exit the alley and head east on Matheson Street, then head south to the end of Ellroy Street. Stay the furthest to the west as you can go to find a fallen tree allowing you to access the grassy area ahead. Examine the bloody mailbox to get the Key of "Scarecrow". What is this, the Wizard of Oz? Also grab the Health Drink at the top of the steps of the house just here. Now that you have the three Keys for Eclipse, return to the house on Levin Street with the Doghouse – use Matheson Street for a quick passage. Inside the house, examine the Eclipse door and Harry will use the Key of "Lion", Key of "Woodman", and the Key of "Scarecrow" to unlock the door. Now go through the door. A cutscene plays and the area is suddenly getting darker again. Hmm... So that was the "Eclipse"... Harry turns on his Flashlight for a light source in this darkness. After the cutscene, grab the 2 Health Drinks on the white lawn table. Find the backyard wooden exit gate to the west and go through it. If you follow this alley to the north and go to the northwest end of Midwich Street, you can find Handgun Bullets and a Health Drink among some rubble. From the alley by the backyard, head south down the alley, across Bloch Street, and continue south in the alley there. Staying on the east side, you can find a Health Drink by the second set of garbage bins (not including the one garbage bin near the beginning of the alley). Further south, you can find Handgun Bullets on the west side by some garbage bins. An Air Screamer may fly towards you around now, and two Groaner Dogs are at the south end of the alley. Midwich isn't very far away now and you can get there by moving west on Bloch Street and then south on Midwich Street. You may find two Groaners and an Air Screamer near the Bloch/Midwich intersection – run past them and stay on the west sidewalk. Very soon you should come up to the school, hearing radio static by the entrance, but there are some helpful items further south that you should get. Just south of Midwich Elementary, two Groaners appear to be patrolling a school bus. Kill them if you wish, and enter the school bus through the open door on the right side. Inside, near the entrance are 2 Health Drinks on a seat. Further back you can find a Save Point on one of the second furthest back seats. Exit the school bus and return to the relative school area just north of here. Find the entrance pathway by the "Midwich Elementary School" engraving and move down it to find two Groaners guarding the entrance doors. You can easily run past them and enter Midwich Elementary through one of the two entrance doors. |
02. Midwich Elementary SchoolNote: The map for this area has north facing to the right. So when I say north, I mean right on the map. When I say east, I mean down on the map. Once inside this already freakish school, move forward to find the School Map on the left display cases. Afterwards, move through the red double doors to enter the Reception hall. Find the Reception to the left (south) and enter it through the doorway to find three books with blood written on them...
Looks like a puzzle of some sort. At the beginning of each memo is a time. This refers to the time on the Clock Tower in the courtyard of the school. If you go through the east courtyard doors, you'll find two frightening Demon Children, and most importantly the Clock Tower in the northwest. You may notice the two slots at the left and right of the tower respectively. You must have to get two items to put in there. If you examine the front of the tower up the steps, Harry will notice that the clock hands are stopped at 10:00. The "Alchemy laboratory" bloody memo has 10:00 written at the top of it. So what you need to do is find the "Alchemy laboratory" for the gold, which must be the "Golden Sun". But before you do so, head back through the east double doors (at the bottom of this area), and enter the Infirmary. Inside, on the blue table is a First Aid Kit. Also check the shelf beside it for a Health Drink. Lastly, on the desk in the room is a Save Point. This is the only save point in the school, so remember to come here when you want to save. Exit the room when you're done. Checking your map, you'll notice that there's a Chemistry Lab on 2F – that's where you want to go. If you check both the connecting hall double doors in this corridor, you'll find that they're locked. So enter the courtyard again and use the west double doors to get to the west corridor (which is the top corridor on your map, not the left; always refer to the compass at the left of the map). In the west corridor, you'll be ambushed by three Demon Children! You'll probably lose some health here, but try not to worry too much about it. Try to sneak between two of them and lure them to a corner, killing them with the Handgun subsequently. Once you've cleared the corridor, enter the room between the Storage and the Hall on your map. Inside, you'll find an apparition, which is named "Larval Stalker". By no means will it attack you, and you can see its trouble of staying on its feet. Soon it will disappear. Anyway, there is a pack of Handgun Bullets on the turquoise bench in the northeast. Exit the room back through the red double doors when you're done, since the other doors won't open. Back in this corridor, there will be another Demon Child, even if you killed them all before. You'll be able to hear loud radio static in this area as well – there is a Demon Child by the right stairs, and another two to the left. The only open rooms in this corridor are the Boys' and Girls' washrooms, however, nothing is in the Girls', and all you'll find in the Boys' is a Demon Child. Head up the stairs in the southwest (top left of your map) to 2F. If you move up the stairs here again, you'll only find a locked door to the rooftop. Anyway, a lone Demon Child vacates this hallway, which is not much of a threat. Entering the upper Classroom on your map, you'll encounter two eerie Demon Children. A Health Drink lies on the desk to the left of the chalkboard. Continuing on to the next classroom through the east door, all you'll find is an empty classroom, so exit to the hallway. You can find Handgun Bullets in the Girls' washroom, accompanied by two Demon Children. Kill them and move past their corpses for something startling. The Boy's washroom is unlocked but nothing interesting is inside. You can access the Music Room corridor, however, you'll go there later anyway. Enter the west corridor through the double doors at the top of this corridor on your map. Just ahead of you by the right heater will be a Demon Child, and another two should come from further back. First, enter the Lab Equipment Room to look for the "sage's water" from the memo on 1F. You can find a purple Chemical bottle on one of the sidewall shelves in this room – that must be it. Exit the room and enter the Chemistry Lab before the newly appearing Demon Child gets to you. Find the old man's hand statue on the middle lab counter and use the Chemical to vaporize it, revealing the Gold Medallion. Take it and exit back to the hallway. Move north down the corridor to find the locked Library Reserve. Move through the double doors there to the north corridor. Enter the Library for a First Aid Kit on the desk near the door. In the back of the room between the bookshelves, the Larval Stalker is back, accompanied by two friends. You can enter the Library Reserve through the other door in the room, only to find a Demon Child – exit to the hall, unlocking the Library Reserve door if you exit from there. The upper classroom (in the north) on your map has nothing inside, however, the lower one contains Handgun Bullets on a table near the window. You'll have to fight or avoid the two Demon Children in the room to get it. Exiting that classroom, you may encounter two more Demon Children, along with the possibility of a Larval Stalker apparition afterwards. If you choose to enter the east corridor (bottom on your map), you'll find two Demon Children roaming around. Enter the Locker Room and find where the noise is coming from. Examine the locker for a surprise. After the kitty leaves, you'll hear a rather gruesome noise... Exit the room to find another Demon Child. If you enter the Music Room, you'll find a closed-up piano and a memo on the chalkboard, which is irrelevant at the moment. Head back down to 1F, but take the northeast staircase (bottom right of your map), past the Demon Child if it's there. On 1F, there will be a Child Demon near the staircase, and another one further down the hall. Enter the upper Classroom on your map for Handgun Bullets on the back table, as well as noticing another clumsy Larval Stalker in the room. Exit the room and head east back down the hall. Use the double doors near the stairs to get back to the Reception hallway, unlocking them first. From this corridor, exit to the courtyard and go up to the Clock Tower. Insert the Gold Medallion into the Golden Sun slot on the left, and you'll hear the clock hands move. Examine the front of the tower up the steps for Harry to notice the clock hands at 12:00. 12:00 is at the beginning of one of the other memos in the Reception – "A place with songs and sound" – now where would that be? Obviously the Music Room – head up the northeast stairs (bottom right of your map) through the north double doors, if you unlocked them; if not, use the other stairs. Enter the Music Room corridor and enter the Music Room itself. The piano cover is now open – who could've done it? There are some bloody keys, which involve a puzzle that relates to the memo on the chalkboard in the room. Piano PuzzleChecking the chalkboard in the room, there's a riddle which explains this puzzle and reads as follows:
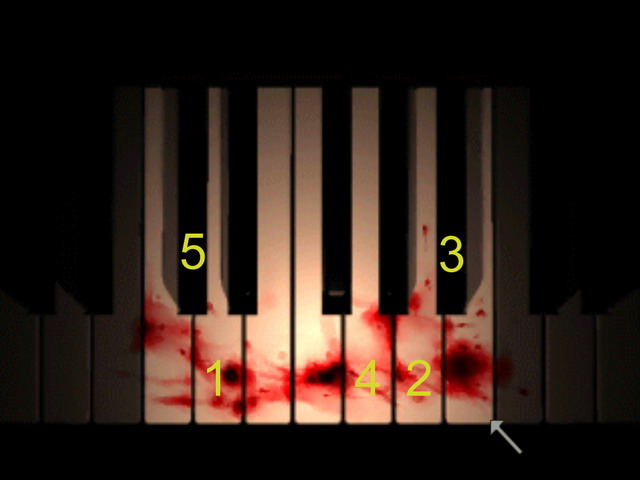
Examining the piano and pressing the different keys, you'll find that some of them make sound as usual, and others are broken and make a wooden sound. The idea of this puzzle is to coordinate between the riddle on the chalkboard and the keys on the piano. There are five birds mentioned in the riddle, and your first idea would probably be to press the keys that work in a certain order, but that won't work and there are too many working keys. Checking the keys more carefully, both black and white ones, you'll find that five of them don't work – there are five birds – that's it. You must determine the order in which to press the five broken keys on the piano relating to the riddle. Let's start things at the beginning. "First flew the greedy Pelican, Eager for the reward, White wings flailing." Okay, so a greedy Pelican flies in, eager for the reward, with its white wings flailing. From this stanza alone, it's impossible to decipher the position of the Pelican, but the next stanza explains, "Then came a silent Dove, Flying beyond the Pelican, As far as he could." This is not fully clear but it seems to point out that the Dove is as far away as possible from the Pelican, meaning one's at the beginning, one's at the end. Beginning to end is normally left to right – how a book is read, for example – so the idea here is that the Dove is at the right end, flying as far as he could, and the Pelican is at the left end. However, if you check the keys you'll find that both the first and last keys that are broken are black keys, and both these birds are white – "white wings flailing" is mentioned of the Pelican, and Doves are naturally white. So instead of these birds being on the close and far end black keys they belong on the first and last white keys, respectively, that are broken. Moving on, read the next line, "A Raven flies in, Flying higher than the Dove, Just to show that he can." So the Raven flies higher than the Dove, which is at the farthest right white key. First of all, the earlier part of the puzzle was mentioned moreso left to right, instead of high and low, but this is quite obvious. Since we're dealing with music here, "higher" would higher pitched, meaning more to the right on the piano. There's only one broken key past the Dove, which is the black key just right of it, and it hasn't been taken. Furthermore, already looking at the fact that the Raven flew higher than the Dove, Raven's are naturally black – the last broken key on the right is black. Makes perfect sense. The next stanza reads, "A Swan glides in, To find a peaceful spot, Next to another bird." A Swan comes in the picture, which is a white bird, and finds a peaceful spot next to another bird. With only two keys left now, one is black and one is white – and we've already determined that Swans are white – but the explanation will continue. Since Swans are white, the Swan can't sit next to the Pelican, which is at the far left, since it has a black key beside it and no broken white keys near it. However, on the other side, there is a broken key just to the left of the Dove, and this key is the second last broken key on the right. This is where the Swan sets down, since the key is also white. "Finally out comes a Crow, Coming quickly to a stop, Yawning and then napping." First of all, there's only one key left, but this stanza is ridiculously easy to understand all by itself. Crows are naturally black, and there's only one black key left, which is at the left end. Furthermore, the stanza mentions that the Crow quickly comes to a stop, yawns and naps, which is clear that he doesn't go far at all and instead stops at the first place available. So the Crow rests at the first black key on the left. Now the puzzle has been solved. Now that the solution to the puzzle has been found, work it with the keys on the piano. The above descriptions already tell you the order, but the image below is a lot easier to follow: So in other words, press the second white key from the left, press the second white key from the right, press the first black key from the right, press the third white key from the right, and press the first black key on the left. After pressing the five broken keys in the correct order, a medallion will fall down to the floor from the wall in the room. Grab the Silver Medallion after it falls and exit all the way back to the Reception hallway on 1F. Unfortunately, there will be two eager Demon Children in this corridor. Kill them and head to the Clock Tower in the courtyard. Insert the Silver Medallion into the Silver Moon slot on the right, and you'll hear the clock hands move once again. Examine the tower up the steps and Harry will notice that the time has changed to 5:00. The last blood-written memo has 5:00 at the top of it – "Darkness that brings the choking heat" – where would that be? Heat, eh? Must be the Boiler Room in the basement. Reenter the east corridor through the double doors to discover another Child Demon. Ignore it and head through the double doors to the north, subsequently going down the stairs there to BF. Enter the Boiler Room through the right door. Find the illuminated red light on the right boiler, then examine it and press the switch to turn it on. Enjoy the creepy sound and return to the Reception hallway on 1F. Another Child Demon here – will it never end!? Ignore it and find the Clock Tower once again in the courtyard. Examine the small door up the steps and Harry will enter the Clock Tower. Once, inside, move down the ladder just ahead of Harry. A familiar siren is heard... Follow the pathway and go up the ladder down the steps ahead. Once up the ladder, go through the small door in front of you. |
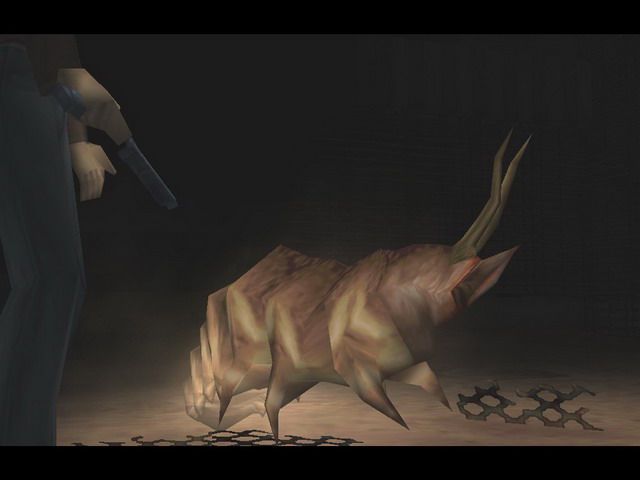
03. Nightmare SchoolNote: The map for this area has north facing to the right. So when I say north, I mean right on the map. When I say east, I mean down on the map. In a cutscene Harry is confused at where he is. It seems to be the school – the courtyard – but its appearance is very different. The east double doors here are locked so head through the west doors. Just inside are two Child Demons – left and right. Try to get out of the way and enter the Storage. Inside this peculiar room is a pink Rubber Ball on one of the three tables that seems to be of Harry's interest, so take it. Exiting back to the hall, you'll find another Child Demon in the area. Inside the room between the Storage and Hall on your map you'll find a large, disturbing fan as well as Handgun Bullets and a First Aid Kit on the left benches. Back in the hall and checking the south double doors, you'll find that they're locked, and the same for the north doors. Upon this, enter the Hall in the north. Just inside the room you'll be ambushed by five Giant Roaches – act quick with the Handgun. Stay along the inner wall and pass through the other door in the room. Once here, feel free to unlock the double doors beside you, and enter the west Classroom through the nearby door. After noticing some bloody lockers, look for the desk in the center of the room. You'll find several odd cards on the desk, and one particularly interesting – take the green Picture Card. If you exit back to the hall through the east door you'll find that the hall is blocked off. So in the Classroom, enter the next Classroom to the east to continue. Be alert in this room, there are four Child Demons! Try your best to not get cornered, and exit the room, preferably from the west door, as it's the closest. Now on the other side of the hall, grab the Health Drink on the nearby bench. The east end of the hall here is blocked, so head through the east double doors. Three Child Demons vacate this hall – two near the door and the other far back in the Reception. The Infirmary is always a great place to go so enter the Infirmary in this hall. Just as before, there is a Save Point in here, but it's on a different table. Also like before, there's a Health Drink in the shelf right by the table, and a new edition is a First Aid Kit on the other side of the save point table. Take good note of the save point here as it's the only one in this entire area; come back here if you need to save. Exit the room when you're done. Back in the hall another, but lone, Child Demon will appear in the south. Ignore it for now, and if you enter the Lobby you'll only discover an odd room with two Child Demons inside, one at each side of the room. In the corridor again, move to the south double doors to find a Child Demon roaming around. Kill it and move through the door down the small passageway past it, since the double doors here are locked. Once in here, you may find the scene familiar. In this same room in the normal school, there was a painting of this door with the two corpses on the wall... now it's real. Anyway, grab the Handgun Bullets on the left couch and examine the door between the corpses on the wall. Harry notices a horizontal slot in the center of the door. Open your inventory and use the Picture Card you got just earlier. Go through the door. Entering the Girls' washroom just in front of you in this hall will transport you to the 2F Girls' washroom, although nothing is inside it. Exit the washroom to the 2F hall and enter the Boys' washroom up here, to find two boxes of Handgun Bullets, and Shotgun Shells on the floor inside. Back in the 2F hall, the hall is blocked just past the washrooms, so enter the Girls' washroom to be transported back down to 1F, in the Girls' washroom down there. Exit the room to return to the 1F hall. Entering the Boys' washroom back on 1F, you'll come up across a blocked off area with a door. Examine the door to open it, and a stunning corpse is seen on the wall ahead. Examine the right wall to find some blood- written words, and the awesome Shotgun lies on the ground to the left by the open door. Exit the room and enter the southeast Teacher's Room. Inside the room, quickly diminish the two Child Demons and the Giant Roach before they get to you, then continue through the southwest door to the next Teacher's Room. Once inside the room, quickly kill the Giant Roach moving towards you and grab the Handgun Bullets on the right chair ahead. Three blue phones can be seen on the table in this room but Harry says he can't use the phone. Try to exit through the far door and one of the phones will ring, and Harry will answer. Afterwards, exit the room through the same door. Out in the hall, three viscous Child Demons will surround you, as well as a Giant Roach. Try to run forward and stay against the right wall to initially avoid the enemies, and head up the stairs to the west to move up to 2F. Move up the stairs again and go through the door at the top to access the roof. Moving into the right side of the area, the camera angle changes, hinting at a hole by some blood – examine it to notice a hanging key just out of reach. At the far end of the roof is a red valve. If you open the valve, water will will enter the drainage system. Harry notices that the water drains into the wrong hole, thinking of the hanging key in the other hole. He also suggest that maybe he could plug it uo somehow, and shuts the valve. Checking your inventory, you should notice an item that will be sufficient for blocking the hole – it's bright pink. Move to the hole by the edge to the right of the valve and put the Rubber Ball in the hole. Now open the drainage valve, and the key will be knocked down from the other hole, but where? Checking your map, the key should be by the west wall in the courtyard on 1F. Exit back through the door on the roof and move down the stairs to 2F. Move down again to 1F and pass the the double doors just in front of you in that 1F corridor, after unlocking it. Move ahead and enter the courtyard through the double doors. Move down the steps and left just around the corner to find the key – along the west wall at the north side of the double doors. Take the Classroom Key from the drainage ditch and reenter the west corridor through the double doors here. Get back to the south corridor and head up to 2F via the stairs. Down the hallway on one of the side benches against the wall is a Health Drink. Inside the southwest Class Room up here are three Child Demons, and a pack of Handgun Bullets on a chair in the room. Move to the next Class Room through the southeast door in the room to find Shotgun Shells on a chair in the room as well, then exit the room. Dodge the Child Demon and two Giant Roaches in the hall and move through the east double doors. Make your way past another Child Demon and two Giant Roaches in this hall and enter the Locker Room. Those who entered the normal school's Locker Room earlier should be feeling a bit uneasy from the familiar sound. Approach the locker that the sound is coming from and examine it for Harry to open it. After the short cutscene, head back for the door. Something should happen – when it does, pick up the Library Reserve Key on the ground, then exit the room. The north double doors are locked, so head back through the south double doors in the corridor, and make your way through the two Class Rooms to get to the other side of the gate in that corridor. Then head through the northwest double doors to access the west corridor. Now in the west corridor, move down the corridor and enter the Library Reserve, using the Library Reserve Key, by the locked double doors to the north. Locate the shelf at one side of this room to find a First Aid Kit, and a book titled "The Monster Lurks". Find the door at the other end of the room and pass through it. Move in between the two tables in this room to find Handgun Bullets on one table and book about a fairy tale lizard – take note of the story in the book as knowledge of it will come in handy later, trust me. Exit the room through the only other door in the room when you're done. Enter the Classroom just to the left of Harry, using the Classroom Key (if you don't have the key, backtrack a little in the walkthrough). Inside the room are three Child Demons, be aware. Move through the door in the room leading to the next Classroom and grab the Health Drink on the chair to Harry's right. Exit the room to encounter three Giant Roaches in the hallway. Near the gate separating the east from the west in this corridor is a Health Drink on a bench. When you're done here, move down the stairs to the east, and once again, to reach the basement. Enter the Boiler Room to Harry's right, and there will be a little puzzle for you to solve. Valve PuzzleThis isn't a very difficult puzzle, but there's no riddle or any clue in the game to help you with it – just trial and error. In this room you'll find a bunch of bars, which is really two sets of bar, blocking the path in the middle of the fenced pipes, and a valve on each side. The idea here is to turn the valves on both sides until a clear path is revealed. You can try this puzzle yourself, really, it's not very difficult, although it may take a while, but the solution is below. In order to clear the path, before you've done anything at all, turn the right valve twice to the right and the left valve three times to the left. It doesn't matter which side you turn first, because the bars never actually make contact with each other. If you already turned the valves, this solution won't work unless you return the bars to how the initially were. But don't worry about that and just keep trying different solutions until a clear path is provided. Once you provide yourself a clear pathway by turning the valves, move down the path to descend down an elevator. Down the elevator, Harry encounters a large lizard in an allocated area, and Harry has to defeat the lizard in order to succeed. Boss 1: Split Head LizardIf you read the book about the lizard fairy tale just earlier, than you should know how to defeat this monster. The book mentions that the lizard open its mouth, which was what the man wanted, and he fired arrows into the lizards mouth, defeating it. You want to do the same thing, but of course a little different.
It should only take around 6 shots from the Shotgun on normal to piss the Lizard off, and you'll be able to kill him by his mouth after that – you'll know when the Lizard is pissed because he stop for a while and green spew comes out of his mouth. Wait for him to start going again and stand still, with your Shotgun equipped and ready to shoot. The Lizard will come towards you, and when he opens his mouth, Start firing away into the Lizard's mouth and back up at the same time. If you don't back up while shooting, you'll be eaten, although you will get two shots off into is mouth. Repeat this strategy, letting the Lizard approach you so you can fire into its mouth. Whenever you're not shooting, let go of R2 and hold it again, so Harry reloads the gun (just a little trick that doesn't require you to reload in the game or in the menu). It should take around 5 or 6 shots straight into the Lizard's mouth to kill him on normal, and the battle will end with the screen turning blurry. Normal Midwich Elementary After the cutscenes, you'll be back in the normal school, inside the Boiler Room in the basement. Pick up the K. Gordon Key on the ground in front of Harry and exit through the door just past the key. Move up the stairs and Harry will take note of the bell heard ringing in the distance. He opens up the map and marks the Balkan Church – that's your next destination. Move through the nearby double doors, after unlocking them, to reach the east corridor. If you haven't saved in a while, I recommend you use the same save point as before in the Infirmary. Head over to the Reception in the hall to find a list of teachers on the Reception counter. Harry notices the name K. Gordon, the name of the key he got just earlier, and marks the address down on the map. Unlock the Lobby's double doors and pass through them. Then exit the school through one of the two far doors, after unlocking the door first. |

04. Old Silent Hill Part 2Once outside in the foggy town, stroll down the path to the road. You may remember a school bus at the side of the road to the south from before, which had 2 Health Drinks inside, but if you go inside it you'll find 2 Health Drinks this time as well, and there's also the same save point as earlier. Moving on now, you want find where the bell sound was coming from when you were inside the school, and Harry has the Balkan Church on Bloch Street marked on his map, but if you remember from earlier, you couldn't get there from the north, so try the south. If you take Bradbury Street and head all the way east you'll find that the road is demolished. However, there is an alleyway before that point, so head north up that. North up the alley, hearing radio static, there will be a Groaner waiting for you near the end. Kill it, and take a look where it was standing. There's a wooden gate door down a short path there, leading to someone's backyard. Go through the gate into the yard, and try to go through the door to inside the house – Harry will use the K. Gordon Key – go inside. Just inside on the counter is a pack of Handgun Bullets. In the kitchen to the right is another pack of Handgun Bullets, and there's a Save Point on the table in the dining room. Move down the hallway, past the door that won't open, and head through the front door to outside. Now you see you're outside once again, but the whole point of that was to get to the other side of the demolished road on Bradbury Street. Anyway, if you're curious and check out the north of this road, you'll find that it's destroyed, however, there is a Health Drink up the steps at the last house on the east side of the road. Now running south to Bradbury, continue east when you get to it. You may hear some radio static but there won't be anything to worry about if you stick to the north side of the road. On a bench farther east lies a Health Drink, and just past that is an alleyway that you'll have to take, since the road ahead to the east is destroyed. North in the alleyway at opposite ends you'll find two Air Screamers (one on each side), and some Handgun Bullets on the ground around halfway through the alley. On the north side, past a Groaner to the west, is a Chainsaw store, and there's a Chainsaw in the smashed window. First of all, you can't pick it up just yet since you have no gas to power it, but remember it for now. Continue east en route to the church, and when you reach it on your map, move up the steps and go through the doors. Inside, you'll meet a crazy old woman in a cutscene. She presents you with a pyramid and suddenly leaves. Move up to the altar and pick up the "Flauros" and the Drawbridge Key on it. There's also a Health Drink on a stand near the altar, and a Save Point at the back of the room. The door the woman went through won't open, so exit the church through the main doors back to outside. The woman inside the church told you to make haste to the hospital, which isn't on your map – there is a bridge crossing east, and you do have a key for a drawbridge, so that's your destination. However, just past the church is a gas station that you should check out. Avoid the Groaner outside and head through the open door by the single "SUPER TUESDAY" sign on the wall to the west of the pumps. Inside you'll find a Gasoline Tank on the shelf, Handgun Bullets on the ground, and yet another Save Point on a table – but seriously, you just met a save point one minute ago, so it's really not necessary. Anyway, the gas tank is not a key item, but if you remember the Chainsaw from before, you can now go pick that up. However, there is another gas- powered weapon shortly ahead that may make you think twice about which to choose – since you can only power one of these two weapons with the gas tank (in a replay game you can get them both). Before moving on to the bridge, you may want to head around to the back of the gas station, where you'll find Handgun Bullets and Shotgun Shells by the truck there. Anyway, continue east to the drawbridge. Once you reach the bridge, down the chipped off steps on the south side of the bridge is a First Aid Kit and Shotgun Shells (the Shotgun Shells are a bit hard to notice), but there are two annoying Air Screamers in the area. Kill them if you can, and run down the bridge on the south side to the small control booth and enter the bottom of it through the door by the barrels. Inside this dark room (make sure your Flashlight is on) you'll find the Rock Drill on the small yellow boxes, which is the other gas- powered weapon. All in all, both the Chainsaw and Rock Drill are great, but I'd personally give my vote to the Rock Drill. Make your own decision with these two weapons and take one. Leave the bottom room of the control tower, and if you move around it to the east you'll see that the bridge is up. No worries, though, since you have a key for that. Move up the steps on the control tower and enter the top room. Inside, you'll find the Shopping District Map on the chair and another Save point on the desk. Deeper into the room is a Health Drink on a small box and a keyhole in the control panel. Use the Drawbridge Key and lower the bridge. Exit the tower and cross the now lowered bridge to Central Silent Hill. |
05. Central Silent HillAcross to the other side of the bridge by the booth on the northside (the pink box on your map) is a Health Drink, and on the southside steps is a pack of Handgun Bullets. Continue east to what turns into Sagan Street to be welcomed by two Air Screamers, trying to smack you in the face – not a very pleasant welcoming I might add. Checking your map, there is a Police Station just ahead on this street, so be sure to check that out. On the way you'll encounter two new enemies, called Apemen, that will jump on you and drain your health – once again, not a pleasant welcoming to this side of the town. Inside the Police Station, you'll find Shotgun Shells on a bench and two packs of Handgun Bullets on the very tall reception counter. Inside the room to the west are more Handgun Bullets and a Save Point on a desk, and more Shotgun Shells on another desk. There is also an interesting memo on the desk with the shells, and on the chalkboard as well. Once done here, leave the room and exit back to outside. Returning outside to the wilderness of the Apemen, check your map for a hospital, remembering what the old woman from the church said – Alchemilla Hospital in the south, on Koontz Street. That's your current destination. Head back west on Sagan and take the south route on Crichton Street. Ignore any enemies on the way and enter the small courtyard of Alchemilla through the two large gates on the south side of Koontz Street. Inside the yard are two Groaners waiting for you – ignore them and quickly enter the hospital through the double doors to Harry's right. |
06. Alchemilla HospitalInside this already frightening hospital you'll find a Save Point on the Reception desk. Take note of the map on the wall inside the Reception area as well (you can't get to it right now). Head around the Reception to the hallway to hear a gunshot... Follow the hallway and go through the first door on the left for a cutscene. Harry meets Dr. Michael Kaufmann who at first doesn't welcome Harry too nicely. The man doesn't talk for long and leaves the room after a while. Once you're left alone in the room, the door behind you leads back to the hallway, so go through the door to the right (Harry's left). Pass through the other door in this empty room to get the First Aid Kit on a box and the Hospital Map within the Reception. Now with a map, head back to the Examination Room and go through the east door, to the Medicine Room. All in here is a newspaper with something clipped out, so exit to the east hallway through the other door in the room. Enter the Doctor's Office to find the Hospital Basement Map on the table by the wall, and through the other door in here to the Conference Room is the Basement Key on the conference table. Leave both rooms and enter the Kitchen from the hallway. Inside, move straight ahead for the camera angle to change, seemingly focussing on some bottle in the foreground. Examine the bottles to take a Plastic Bottle from the bunch. Also in the room is a Health Drink, on the island. Exit back to the hallway when done in here. Continuing along, enter the Director's Office to come across a very messy room, with books strewn all over the floor and cupboard doors carelessly opened. Head around the desk at the back of the room to find red liquid splashed all over the floor from a shattered glass vial. Examine it for a closer view. Hmm... You just picked up a bottle in the Kitchen, so use the Plastic Bottle to pick up the liquid, to get the Unknown Bottle in your inventory. Just to let you know, you don't have to do this – you don't even need to get the bottle in the first place, however, doing this will give you an advantage late in the game and will also help you get one of the better endings in the game. Leave the room. The elevator won't work up here so you're only left to go down to the basement. Use the Basement Key to access the stairway, and go through the door down the stairs to the basement of the hospital. Don't worry about the radio static down in this dark basement, there are only Roaches down here – three of them. Once they're done with, enter the only unlocked room down here, which is the Generator Room. Inside you'll find the generator of the hospital, which isn't making any noise, not to mention the elevators not working. Examine the panel on the generator to find a note stating what the generator powers, elevators being one of the few things, and turn it on. Leave the room after doing so. Now with the generator on you can access the elevator. You can head back up to 1F and enter the elevator from there, but that's really not necessary since you can enter the elevator from here. Once inside, examine the panel and move up to 2F. Trying to open the double doors to access the main hallway up here, they won't open. Reenter the elevator to try the same up on 3F. Up on the third floor, these doors won't open either... Thinking what to do, reenter the elevator. Examine the panel for an absolutely shocking sight – a fourth floor! Take a moment to take this in, and then press the "4" when you're ready. |
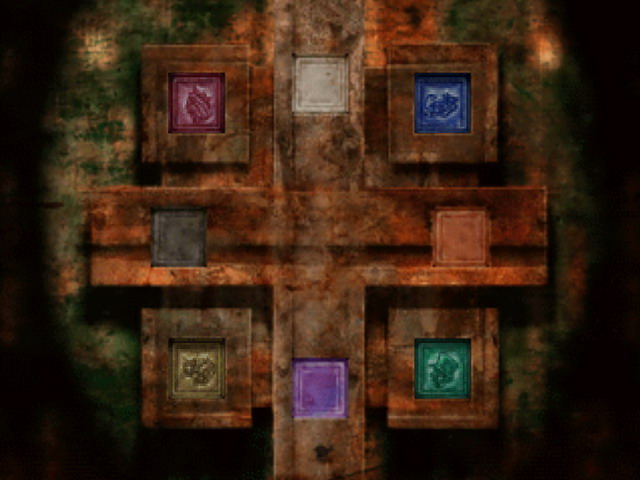
07. Nightmare HospitalAfter Harry's vision of a girl walking into what seems to be an Antique Shop, the "non-existent" fourth floor around you is decaying of blood. Head through the double doors. Start to follow the lifeless hallway before you, hearing a click sound shortly after you begin – that was the doors locking behind you! All the rooms in this corridor won't open so don't turn back and continue through the double doors around the corner. Now in another hallway, run forward to hear these doors locking behind you, and go through the end door in the corridor, since all the rooms won't open here either. Now you'll be in a stairwell, so quickly get off this floor before you're locked in, by going down to 3F. Now your map can be used, since this floor actually exists. If you're still a bit curious of the mysterious fourth floor, head back up the stairs, only to find... a wall! So that was... an illusion? Anyway, go through the stairwell door on 3F to the west hallway of the floor. Lurking around this corridor is a new enemy, a Nurse Demon. Nurses are quite strong, taking around six Handgun shots before going down. If you have the Rock Drill, however, hold it up and let them run right into you, effectively committing suicide. Anyway, inside the Men's Room you'll find the Plate of "Turtle" sitting on the window sill. Try to leave the room, and see if you can get yourself to see what that noise was behind you. If not, just leave the room (there's nothing there, anyway). Leave the room and enter Room 302 in the corridor, since Room 301 contains only an empty birdcage. Inside 302 you'll find a Save Point and Shotgun Shells, as well as an old, but usable VCR – you don't have a videotape so it's useless to you at the moment, if not period. North up the hallway inside Room 304 you'll encounter another Nurse. After killing it, pick up the Health Drink on one of the gurneys, and you may also notice a steel plate screwed to the wall for some reason, which has no use to you now. The Linen Room by the double doors contains nothing but dryers – "Useless now", Harry says – apparently he hasn't wet his pants yet. Moving on to the east corridor, either through the Linen Room or the double doors in the west corridor, take care of the to Nurses in the area first. Inside the Store Room you'll find Handgun Bullets, a First Aid Kit, and a Blood Pack, oddly enough. The door leading to the other Store Room won't open so return to the hallway. Enter Room 306 to get the Plate of "Cat" on the far wall, and then you'll be done on this floor. You can unlock the double doors at the north end of the hallway and use the elevator, but that's not the ideal way to go, so head back to the west corridor and enter the stairwell. Run down to 2F and enter the west corridor. Start things off on this floor by killing the Nurse in the corridor, and then enter Room 201. Inside this room you'll find a brass Zippo Lighter lying on the table. Leave the room and continue north up the hallway to find another Nurse at the north end. Enter Room 204 for an interesting task. You'll hear radio static in the room, but there aren't any Nurses in here or anything. Move to the back of the room to discover tentacles blocking you from another of those plates. If you run at it, it will grab your foot and suck your blood. Take a good look at what it's normally sucking at – a puddle of blood on the floor. Remembering something of interest you picked up, use the Blood Pack from your inventory. Harry will drop the pack to the left, occupying the tentacles. Great thinking for picking that pack of blood up Harry, phew! Now that the tentacles are partly out of the way, move up to the wall and grab the Plate of "Hatter". Exit the room and head back south down the hall, entering the Nurse Center on the way. Inside this room is a riddle on the wall and a locked door that looks very much like a puzzle. There are four missing pieces, which seem to fit the plates you've been picking up, however, you still need one more of them. Exit back to the hallway, and you'll find that double doors leading to the east corridor won't open as well. You may also notice a large plate slab with a list of names on the by the doors, which is titled "The Grim Reaper's List", and a blank plate slab at the north end of the corridor. Don't worry about it, as haunting and questioning it may be, and reenter the stairwell. In the stairwell, move down the stairs to the main floor of 1F to meet a Doctor Demon this time. Doctors essentially the same as Nurses but are slightly stronger and more aggressive. They also tend to regenerate very often. The doors to the north corridor won't open, so enter the east corridor through the double doors to meet another unhappy Doctor. Inside the Medicine Room awaits another Doctor, and something is heard from behind the other door, although it's locked. Inside the Office in the corridor are Handgun Bullets on the table, and you can also find a Health Drink and a Doctor Demon in the Kitchen. Another Doctor stands in the corridor to the north, and inside the Director's Office you'll find the Plate of "Queen" on the table, after almost pissing your pants, and a Save Point by the far wall. Back out in the hallway, you can check the broken vending machines on the north wall for 3 Health Drinks! Anyway, now that you have the last plate you should return to the puzzle room on 2F. Start off by returning to the west corridor on this floor and running up the stairs to 2F. In the 2F west corridor, enter the Nurse Center to start the puzzle. Plate PuzzleChecking the other door in the room, you'll notice that it has four square depressions as well as four other depressions that have been filled in and are colourful. That means you'll need to use your four plates in the empty depressions to unlock the door, and the riddle is explained in the memo on the wall by the door:
The memo explains eight different colours, and you have four different coloured plates. However, there are also four coloured indentations on the door, totalling as eight. So four of the eight descriptions in the riddle aren't directly related to your plates, but they just makes things easier for you. Starting off, the first sentence reads, "Clouds flowing over a hill." So what colour would that be? Well, clouds are white, regardless of whether they're flowing over a hill or not, so the colour that matches this sentence is white. Checking the door, the square at the middle top is white, so it doesn't involve one of your plates. Take a look at the next sentence, "Sky on a sunny day." The mentioning of a sunny day here may confuse you, but the sky is always blue, even on a sunny day. If you were thinking orange or yellow, that's only the case in a sunrise or sunset, and if you were thinking white, that's the colour of clouds, not the sky itself. So the answer to this sentence is blue, which is the colour of the Plate of "Turtle". Okay, now on to the next sentence, "Tangerines that are bitter." Tangerines are orange (they're small fruit oranges, if you didn't know already), and they're still orange if they're bitter or not, so the correct colour here is orange. The middle right square on the door is orange, so it seems that we're going clockwise here starting at the top middle. Next up is, "Lucky four-leaf-clover." We all know, or at least should know, that clovers are green, be it four-leaf, three-leaf, or whatever. So this colour is green, and the Plate of "Hatter" is green. So now it's quite clear that we're going clockwise starting at the top middle, and so far we've determined "Turtle" (blue) belongs at the top right and "Hatter" (green) belongs at the bottom right. "Violets in the garden." Well, that one was given away quite easily... Violet is a colour itself, but is a variation, if you will, of purple. So the colour here is purple, which matches the bottom middle square on the door. Reading on, the next sentence is, "Dandelions along a path." Dandelions are yellow, although their stems are green (which has already been used), no matter what path they're on. So this colour is yellow, which is the colour of the Plate of "Cat". The next sentence isn't so clear, "Unavoidable sleeping time.". If you really think about it, what colour is most closely resembled with sleep? Well, when you sleep you see black, if you will – the absence of light; darkness, which is what is known as black. So the answer for this one is black, which is the left middle square on the door. Lastly, the final sentence reads, "Liquid flowing from a slashed wrist." This is an obvious one – when a wrist is slashed, as mentioned, blood is discharged from the cut, and the colour of blood is red. The Plate of "Queen" is red, which actually looks a little pink, and matches this sentence.
Once the door is unlocked, go through it to meet three Nurses in the corridor, one right beside you. Inside the Operating Prep Room are two Nurses along the wall, since there is a large gaping hole in the room. Once they're dealt with, head through the other door in the room to the Operating Room to meet another Nurse, who seems to be in charge here. Luckily she ain't no Nurse Ratched and it's easy to deal with her. Pick up the Basement Storeroom Key behind the Nurse on the table and leave both rooms back to the hallway. Enter the Intensive Care Unit room and grab the Disinfecting Alcohol on the table. Note the Nurse behind the table, but you should be able to get out of there before she can touch you. Moving north up the hallway, you can find one more First Aid Kit before you leave this floor in Room 206. After getting that, go through the double doors up here and enter the elevator. Examine the panel and go down to the basement, since you got a key for the Storeroom down there. Hellooooo Nurse! Right after landing on BF, take care of the Nurse right in your face, and then enter the Morgue if you dare... Inside you'll be ambushed by two Nurses from both side of the room right by the door – quickly run forward out of their reach, equip the Shotgun, and blast those suckers. Inside the room lying on gurneys you can find an Ampoule and a Health Drink – don't waste that Ampoule by the way; only use it when you have terrible health and need the strength and energy. Leave the room. Take care of the Nurse that regenerated in the hall and enter the Generator Room, since it's unlocked, before you enter the Storeroom. Walk forward to check the generator, and stand still in front of it – what do we have here? Looking at the awe-inspiring weapon lying against the generator, pick up the Emergency Hammer, which is arguably the best weapon in the game. You can't miss this baby, it is really an awesome weapon that no one should do without – it is definitely worth picking up. Leave the room after picking it up and enter the Storeroom, using the Basement Storeroom Key. Once inside, you can find some Handgun Bullets and Shotgun Shells on the shelves, but there doesn't seem to be any other doors or keys in here. One object of interest, however, is the large wooden cabinet in the back corner of the room. Harry notices some skid marks to the left of the cabinet from it being moved, so go to the right side of the cabinet and push it. Once the small door is revealed, go through it. Now in the secret room behind the cabinet, examine the grate door in the room for Harry to notice a hallway under it. The grate is covered in vines, so Harry cannot open it like this. Remembering that you do have a Lighter, although that won't be enough, check your inventory. Looking through your items, the Disinfecting Alcohol should work great to soak the vines with, and the Lighter can light it all up. So, first use the Disinfecting Alcohol to soak the vines and then the Lighter to light it all on fire and burn the vines. Harry will open the grate after the vines are gone, so go through the grate opening to the stairs below. Once down in this unmapped area, follow the pathway forward and go through the door. In this area you'll be greeted by three Nurse Demons. Take care of them and go through the first door on your left. Entering this hallway, you'll meet two more Nurses. Only enter the first room on your left if you feel like wetting yourself, but the first room on the right contains a Video Tape guarded by a Nurse. If you remember, there's a VCR on the second floor that you can use to watch the tape, but you're busy right now. Back in the hallway, enter the last room on the left, which is the only other unlocked room down here. Inside, Harry will find a picture of a young girl named Alessa, who looks quite similar to Cheryl. After looking at the picture of her, get the Examination Room Key just to the left of the picture. Now it's time to get out of this hellhole of a basement's basement. Head back down the hallway and go through the end door, then go through to door to Harry's right to enter the stairway. Follow the stairs to return to the Storeroom. Now that you have the key to open the Examination Room, use the stairs or the elevator to get to the first floor from the hallway. Once back on 1F, run past the Doctor in the hall and enter the Medicine Room. Enter the Examination Room through the other door in here, using the Examination Room Key. Meet Lisa Garland, a Nurse who works at this hospital. The conversation between the ends when Harry sudden has a major headache. Harry awakens in the normal hospital's Examination Room, and the crazy old woman from the church, who reveals her name as Dahlia Gillespie, greets Harry in a once again strange matter. She leaves a key for you on the and leaves the room, after tell you the other church in this town is your next destination, wherever that is. Once Dahlia is gone, pick up the Antique Shop Key she left on the table... Antique Shop, eh? Leave the room through the west door and get ready to leave the hospital. Save your game at the Reception if you want, and then leave the hospital through the main double doors. In the courtyard, ignore the two Groaners like you did when entering here before, and go through the hospital gates to the streets. |
08. Central Silent Hill Part 2"Darkness devouring the town? Must be on drugs." Once back on the streets, your next destination is an Antique Shop, which you don't know the location for. If you use the Look option for the key in your inventory, you'll see the tag says "Green Lion" on it. Taking a look at your map, you'll notice a shop in the northeast named "Antique Green Lion", so that's your current destination. Start off by heading east down Koontz Street until you reach Simmons Street. If you check to the south at that three-way intersection, you'll find Handgun Bullets and a Health Drink in an alleyway, however, two Air Screamers may follow you in there. At the northwest side of the intersection is a Health Drink on one of the tables, guarded by two Rompers nearby. Take a left a Simmons, heading north all the way to the Antique Shop at the north end of the road. By the way, if you're wondering just what the hell that sound is that your hearing everywhere, somewhat like a siren, that's just the music, so don't worry about it. Try to ignore any enemies on the way to your shop, especially the three Air Screamers near the Antique Shop in the north. Once you reach the shop in the north you can see that it looks exactly like the Antique Shop from Harry's vision in the hospital earlier, except the town around it isn't bloody as hell – this is definitely the right place. The front door is wide open, so walk through the doorway and down the steps to meet the actual door of the shop. Use the Antique Shop Key to get inside. Once you set inside the shop, there will be a Save Point right in the foreground that you can use. Turn on your Flashlight to brighten up the room and look around deeper in the room. There is a cabinet with trace marks on the ground by it, so push it aside to reveal a hole in the wall. Before Harry can check it out, someone enters the room behind him – it's Cybil! After informing each other, Harry decides to check out what's through the whole, leaving Cybil to cover him from the main room. After the cutscene, head down the narrow path and go through the hole at the other end. Through the hole, Harry finds a strange room with an altar – is this the "other church"? Looking around the room, grab the Axe sticking out of the framing on the wall. There's nothing else to do here, so try to go back through the hole and Harry will have another headache. |
09. Nightmare Central Silent HillHarry awakens back in the Nightmare Hospital examination with Lisa. Harry asks Lisa a few questions about what Dahlia said and she gives an explanation. Just after that Harry awakens back in the Antique Shop, however, the nightmare version of it. Now Harry wants to get to the Resort Area, since Cybil said that's where she last saw her. He doesn't know how to get there so he must return to Lisa in the hospital to ask her. After Harry thinks to himself, move forward with the awkward camera angle to find another Save Point on the desk, which is in the exact same spot as the one that was here in the normal world. Leave the room through the only door, and then move up the steps in front of Harry and move out to the streets, or what used to be the streets... The road is now grating and the town looks like the Nightmare School and Hospital effect. There are too many enemies in the nightmare world of Silent Hill, so it's best to always run, dodging any enemies that you might encounter. Your current destination is the hospital, to talk to Lisa, so you need to find a viable route to get there. Moving south past any Apemen and Groaners, you eventually find the "road" ends before Sagan Street, so you'll need to find an opening around here somewhere. Stay on the east side of the road, you'll find a torn hole in the shutters for the Silent Hill Town Center, so go through the hole into the mall. Inside the Town Center lobby there isn't anything of interest except for the escalators and the large TV screens nearby. There's nothing down here, though, so head for the escalators and begin to climb up for a message from the TV screens. Continue up the escalators to the second floor and take the left passage, since the right ends shortly because the floor is missing. You'll hear radio static up hear but so far no enemies and in view or even heard. On the left path you'll meet a door to a shop, which I highly suggest you enter before continuing on towards the static. Inside the shop you'll find two packs of Rifle Shells (although you don't have the Rifle yet), a First Aid Kit, and a Save Point. The other door at the back of the room won't open so leave the shop through the front door. Continue following the path towards the static to see what looks like slugs sucking on a corpse. Move closer to check it out and the floor panel will fall with the weight of Harry moving on it and you'll land in a pit with a large Larva. Good luck. Boss 2: Twinfeeler
Every time the Larval comes up to the surface, it will spit green acid at you as it slides across the sand, and then it will return to down in the ground. Each time it comes up, you'll have around five seconds to shoot it until it goes back down. Sometimes, however, the Larva will strike you (by ramming into you) before you even know where it is, and this can be frustrating. Always ahve your hands over the L1 and R1 buttons so you can strafe out of the way at any time. Then, one out of the way, start emptying rounds into the thing. The Larva has two attacks: one is spitting acid at you every time it comes up to the surface, and the other is ramming into you. Both inflict quite a bit of damage, so be aware of your health state at all times and be ready to heal. It may be hard to avoid this attacks, sometimes, because a lot of the time the Larva will come up right in your face while you're moving. That's why it's best to stand on the middle the remains of the grating from the floor above, because that way the Larva can't just pop up beside you. You still have to keep your eyes and ears open, and be prepared to strafe out of the way and start blasting away at the monster. It shouldn't take too long to defeat this thing; it should only take around 10-15 shots with the Rifle. If you don't have enough or any Rifle shells, use the Shotgun or Handgun. Obviously the Shotgun is better because of its strength and widespread blast, and it works very well, but the Handgun is also quick and easy to use. After taking enough damage, the Larva will roll up in a ball and the fight will be over. Fortunately, your means of escape are helped by the Larva then getting back up and smashing through the glass in the area. After the Larva smashes through the glass and gets away, run ahead and go through the opening to outside. Now at the east side of the Town Center, there will be several more enemies out here, including different looking and stronger Air Screamers. It's best just to try and outrun them, avoiding their attacks. Start your route from this side by running south to meet an individualized grating path, and follow that as it turns to the right onto Sagan Street. Follow this way east and never stop. Eventually you may have three Groaner Dogs and an Air Screamer chasing you, but don't stop to fight them and run like hell! This is truly insane, the features of the alternate world and these multiple creatures hunting you down. Don't stop until you reach the Police Station near the end of Sagan Street and enter it. Oh man, that was intense! Now you can finally take a moment to breathe. While you're hear, check the area for any new items. On the front reception counter you'll find Rifle Shells and Handgun Bullets, and on the table by the front doors is a Save Point. You might want to save your game, anyway, so it would be smart to before you go back outside. Once you're ready to return to thrilling world outside, continue the chase by exiting through the double doors and running west to Crichton Street, past the Apeman greeting you outside. Take the south route at Crichton all the way to Koontz, past the barrage of Air Screamers. Once you reach Koontz Street, head through the hospital gates. Just inside the gates, you'll be swarmed by three Groaners. Quickly enter Alchemilla before they touch you. Now you can take another breath, stepping into the hospital again. Use the Save Point on the Reception counter if you need to and enter the Examination Room to talk with Lisa. She remembers a waterworks near Midwich that is closed off, and that you might be able to get to the lake from there. Lisa doesn't feel she can come with you and Harry leaves the room. Exit the hospital and head for the waterworks. Out in the courtyard the doggies are gone, so there's no pressure. Go through the gates to the street, or what's left of it, and follow the new path forward as it leads to a stairway. There's nowhere else you can go, so run up the steps to the roof at the top for a short cutscene. Up here, a giant moth will come into sight – it's the Larva from the mall, it's turned into a Moth and wants revenge! The stairs you just came up are destroyed, so it's time to fight. Boss 3: FloatstingerRight at the beginning of the fight you'll be standing just in front of the giant Moth, so it would be wise to get some breathing room. Staying on this main roof section is generally not bad and it can work well when fighting the Moth if you have good movement, but the higher area up the stairs with the water tower works very well, since you have some cover. If you stay on the main level, though, it's hard to see the whole Moth, even when holding L2, and it can be hard to run around, shoot, and avoid attacks. So it's really best to go up to the water tower.
The Shotgun is a great alternative method, especially since you can actually move while shooting. So if the Moth is in your face, continue to shoot it as you step back, and then move to a different corner. Sidestepping while shooting works great as well, especially since you can constantly be moving while shooting while you're shooting, avoiding the Moth's attacks. You may want release R2 to put your gun down to auto-reload instead of doing it manually while standing still. The Moth has two attacks. which are very similar to its attacks as the Larva. One of them is simply spitting green acid on you, which inflicts moderate damage, and the other involves the Moth moving close to you and smacking you with its abdomen, which is very damaging. To avoid these beatings, simply do not let the Moth get close to you – when it does, sidestep or run to another corner. As for the acid, which is harder to avoid, when you hear the distinct sound of the Moth spitting the acid, try to sidestep out of the way as quick as you can, although this is hard to do. Just don't stand still in one spot for too long and you should be okay. As you run around the water tower, the Moth will always follow you, and rather quickly. You need to be quick to orchestrate this battle well, and you need to know how to strafe properly and when to do it. Try to run a complete circle around the tower and then stop and perform a quick turnaround, ready your weapon, and start shooting. With these tactics, the battle shouldn't be too difficult and the Moth will be eliminated after around 10-20 shots with the Rifle or Shotgun. Return to Normal Central Silent Hill Just when you deliver the final blow to the Moth and it falls to the ground, the world around you turns back to normal. The stairs aren't destroyed in this normal world now, so step down from the water tower area and set your feet on the main street ground by going down the main stairs. Back on Koontz street, you need to get to the waterworks by Midwich, so you must first get back to Old Silent Hill. Follow Koontz street west to Crichton, and take that road north to Sagan. Once there, ignoring any enemies, cross the bridge to west to Old Silent Hill. Return to Old Silent Hill After crossing the bridge, Harry will have his map open to show you that you're at the waterworks, just north of Midwich, to save you the trouble of getting there yourself. Move ahead and check the gate to discover that it's locked. Harry takes a closer look to notice how rusty and worn out the lock is, and he may be able to break it if he hit it hard. Take out the Axe or Steel Pipe (or whatever else you prefer) and smash the lock a few times to knock it off. You can also blast it with the Shotgun if you prefer, which only takes one shoot. But it really isn't necessary. Once the lock is broken, go through the gate door to notice the manhole here has been carelessly left open. Give some thanks and go down the ladder in the hole to the Sewers. |
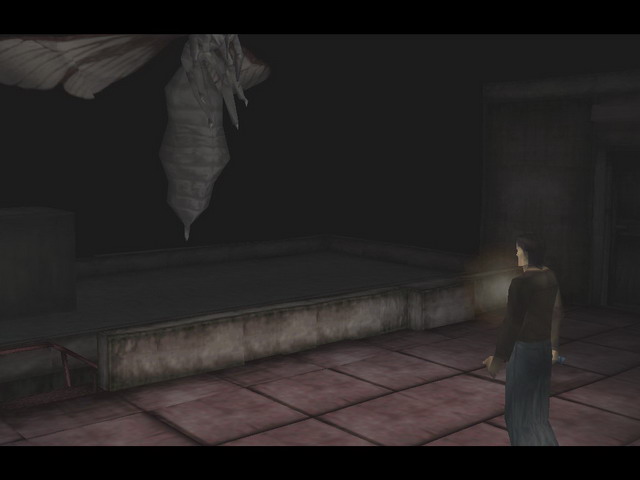
10. Sewers (Connecting to Resort Area)Once down in the Sewers, things aren't feeling so safe. Move right around the corner and follow the path all the way to the near end to hear clicking sounds. New enemies will come in your wake, called Hanged Scratchers – one will come from each side ahead while two Roaches sneak up behind you, essentially forming a three-pronged attack on you. Try to get out of the mess first and then pick them off individually. Equip the Shotgun from now on to deal with future Scratchers. Take a left around the corner and follow the path, killing any Scratchers on the way. What you're probably noticing now is that the Scratchers take quite a while to fall down and they do so quite silently. All it takes is two to three Shotgun shots (on Normal) to kill them, but they won't fall for a few seconds. Once you reach another path intersection down here, take the left route to find some worthy items. At the end, the path diverts into two narrow routes. The right route contains a Health Drink, Handgun Bullets, and Shotgun Shells at the end, and the left route has Rifle Shells. After getting all the items, head back all the way east and continue past the intersection there to move on. There will be some objects blocking portions of the path in some areas this way, but there's always a way to get through. Once you reach the end of this path and meet a fence, go through the fence door on the left side path, since the one on the right is locked. Follow the path around the water, and on the far side past the generator, and over the steps ahead. Continue along the path aroung the corner to finally reach some important items. On the desk you'll find the Sewer Map (Connecting to Resort Area) and a Save Point, and if you check the open key box on the wall you'll get the Sewer Key. Now that you have the exit key, head through the gate door to the right, and through the next one, after unlocking it. Head all the way back west to the intersection, running past any Scratchers – some may drop down from the roof – and then head south all the way to the end, passing the west opening (where you initially entered the Sewers). By the fence in the south, use the Sewer Key to go through the door and continue ahead over the narrow blue grating. Just up ahead, you should see three Roaches that may take separate paths towards you. Kill these pests before moving on. After the Roaches, the path diverts once again into two. The left path has a First Aid Kit at the end and is blocked off, but the right path leads to a ladder – go up it. Now on a blue grating ledge, pick up the First Aid Kit to Harry's left, and follow the grating on the actual floor ahead. If you hold L2 you should notice several Hanged Scratchers hanging on the roof just up ahead, which is not great news. Get the drop on them now by using the Shotgun. This may trigger the others to come towards you, but they won't move so quickly. After dealing with the three Scratchers, continue following the Sewer path to find another Scratcher on the roof just ahead. Both west and south paths here are blocked off, so take the east route. You'll encounter several Roaches on the way, which shouldn't be a big problem, and at the east end wall you'll find a Health Drink and Handgun Bullets. Follow the path to the south past a Scratcher to the south pathway on your map. The gate door to the east is locked, so you'll need to find a key for that. Start heading west down the pathway, moving through the first gate door along the fence when you reach it. Continue east, navigating over the blue grating paths, eliminating any Roaches on the way, and go through the next gate door. Farther west, take the left route when the path diverts into two and head through the gate. Head to the west end of the pathway to find a section of bloody water with an item of interest, although the wide camera angle and music doesn't seem to be good news. In the water is the Sewer Exit Key – grab it, and once you do that, three Scratchers will appear in the area from the roof and from the water to corner Harry. However, they do not truly block Harry at all side, and you can slip away through the back right hole between them. Turn around and go through that missing link, and whatever you do, do not take the left path (Harry's left), which is a dead end, or the result will very likely be your death, since the three Scratcher will truly trap you in there. So take the path to Harry's right, which contains another Scratcher – have the Shotgun ready and quickly blast it and run past before the others get to you. Go through the gate just behind the creature. On the other side of the gate, you may notice the Scratchers trying to get through the fence, but they won't be able to. Head back to the east, now that you have the key. Don't waste time with Roaches and just keep running – the sudden bang sound shouldn't convince you to stop and fight, anyway. Once through the gates and now back in the east, you'll encounter three more annoying Scratcher's by the exit gate. You don't necessarily have to fight them, though, and you can run in between the first two and quickly use the Sewer Exit Key to get through the gate right beside the third Scratcher – run at the door while pushing the creature and constantly pressing X to use the key and go through the door. Now on the safe side, use the Save Point on the barrel ahead if necessary, and climb up the ladder beside it. |
11. Silent Hill Resort AreaAh, freedom... fresh air. But are we there yet? Check the area around you to see if you can find any items or a map. Run forward and investigate the destroyed building around the corner, to find Rifle Shells and Handgun Bullets inside to the left, and a First Aid Kit inside to the right. Exit the wreckage and head forward to the road. The road is demolished one way, so head the other way and check the Information sign for the Resort Area Map. Checking your new map, you're currently on Bachman Road. An Air Screamer may come to greet you soon or may have already. Head south, deeper into this resort side of town. First of all, there are quite a few places you can go in this resort area, but you can immediately run to the Lighthouse area on your map if you really feel like doing so. However, you will miss a lot of information if you do this and you will receive one of the two bad endings in the game, so it's recommended that you check the town thoroughly. Looking for places of interest on your map, Annie's Bar stands out pretty nicely, so go check that out. The entrance is at the south of the building on your map, and you'll find two Rompers out there. Unless you plan to pick them off one by one, don't bother with them and quickly enter Annie's Bar through the front door. Inside the bar, Harry will encounter Kaufmann struggling with a monster ontop of him and will save him. They'll chat for a bit, but the typical Kaufmann doesn't talk too much and leaves rather quickly. Searching the room for items, you'll find two Health Drink on the bar by the entrance, which blend in quite well. There's also a Save Point on the bar. Deeper into the room by the pool tables, you'll find the Kaufmann Key and the Receipt where Kaufmann was struggling earlier, which evidently he dropped. The key looks to be a motel key, and there is a motel in the general area, and the receipt has a code written on it. If you use the Look command to take a closer look at the receipt, you'll see that it says "Indian Runner" at the top of it, which is a name of a store to the east. Exit the bar and head over to Indian Runner. You may encounter some Groaner Dogs on the way, but they're easy to take care of. Near the entrance to Indian Runner you'll notice two Rompers. You can either kill them individually to be safe, or you can run right up to the double doors and enter the place, after using the code. Both ways work out quite well actually, and it's not very difficult to avoid the Rompers if you just run like hell to the doors. When you reach the doors, examine them to find a padlock with a 4-digit code. On the receipt that matches this store, it says "0473", and that is the code to unlock the door. Enter the building after entering the code. Inside the quiet general store, you can find Rifle Shells and a Health Drink on the front counter. There's also an interesting diary on the counter and a picture on the wall behind it with a man, presumably Norman Young, in front of a motel. The shopping list on the wall to the left of the picture contains a code, 0886, to the back entrance of what seems to be the motel. The motel is your next destination, since you already have a key for it as well, but you're not done at Indian Runner just yet. Near the cash register on the far counterside is a safe door, which is locked. There is a cabinet back the other way, which you can open the drawer if you examine it. The Safe Key is found inside the drawer – I wonder what that's for. Move up to the safe door and use the Safe Key to open it. Drugs are found inside... Interesting – you don't ever need to open up this safe and it doesn't help you game-wise if you do, but it helps you understand a bit of what was going on in Silent Hill – Cybil mentioned drug trafficking earlier. You now have a code for the motel and motel key, so leave the store and head south to the motel. You may encounter an Air Screamer and a Romper near the back entrance of the hotel, which you should probably kill to make this easier for you – especially the Romper. On the west side of the road you'll meet the back entrance of the motel, where you'll find a door locked by an electronic keypad. Examine the keypad, and remembering the code from the shopping list at Indian Runner, enter 0886 and press Enter to unlock the door. Then enter the motel through the unlocked door. Just inside the door you can find a Magnet on the couch (this item may be on the desk in the room instead, sometimes). Also on the coffee table is an interesting newspaper article explaining more on the narcotics issue in Silent Hill, partially on top of an even more interesting magazine. Unfortunately, you won't be able to "read the articles" of the magazine. Through the door by the couch you'll find a motorcycle in a garage area, as well as Shotgun Shells on the ledge by the wall and a Health Drink on the stair stool near beside it. Return to the living room of the motel. Further in the room on the desk you can find another diary involving the mystery man. Through the open doorway to the left you'll find a Save Point. There's nothing else in here so leave the motel office through the door around the counter in this Reception room to outside. Now in the hotel compound, remember that you still have a key, which is for Room 3 if you look at the key in your inventory. Head forward to cross to the other side of the lot and find Room 3 to the right, entering it using the Kaufmann Key. Right near the door is a suspicious cabinet – every cabinet in this game is suspicious so why would you not think this one was? Push the cabinet from the right side and check the ground to spot what looks like a key, glinting in the narrow hole. Harry can't get the key like this because the opening is too small. You just got a magnet earlier, which, if you check from your inventory, has a string attached to it – that should be plenty. Use the Magnet from your inventory to click onto the metal object in the hole, and you'll get the Motorcycle Key. Motorcycle, huh? There's a motorcycle in the hotel office, but what exactly could this key be for? Leave the motel room and reenter the hotel office across the lot. Move into the main room through the open doorway and go through the door by the couch to enter the garage again. If you check the motorcycle, Harry will just comment that it's an old motorcycle, but then he'll notice dust wiped away only around the gas tank – use the Motorcycle Key to open the gas tank. Harry finds a small glass vial inside the tank, very similar to the smashed vial in the hospital. Just then a very pissed Kaufmann enters the room and really gives you a threat. With that attitude, maybe you shouldn't have saved him, the bastard. Whatever is in that vial must be very important, because Kaufmann almost swallowed up himself giving you that speech. Anyway, Kaufmann snatches the vial from Harry's hands while he's lecturing him and leaves, rendering pretty much all you did pointless. However, you have clinched one of the better endings of the game, so don't feel upset about that. You're all done here, so leave the garage exit to outside. Now that that ordeal is all done, your next destination is across the bridge, since there's nothing else to do on this side of the bridge. Before the bridge you may encounter a Romper and a Groaner, but it's quite easy not to go near them and just run past. Head over the Sandford Street bridge, hearing static in the distant darkness. |
12. Nightmare Silent Hill Resort AreaOnce again, the world around Harry turns into a nightmare world, although he thinks it feels different this time. Nonetheless, you should already be familiar with this nightmare state by now, and this grating replacing the roads is nothing new. Remembering last time the streets were like this, prepare for another onslaught of enemies. On the other side of the bridge, stay at the north side of the road to find Shotgun Shells and a Health Drink around the barrels when you reach them. There is also a Night Flutter (nightmare version of Air Screamer) and a Romper in the general area, which you should probably take care of while they're on their own. Continue west past both east and west garages, almost always hearing static in the distance. Take a left after the west garage and head south down the pier, past the first Night Flutter on the way. Past that the pier narrows to the right side only, and you'll meet two angry Wormhead Dogs near a stairway on the left. Don't bother to fight them and quickly run down the steps. Move over the set wooden bridge, stepping onto the boat, and enter it through the double doors at the stern. Inside, move ahead and go through the door up the steps to the cabin. Inside the boat you'll meet Cybil, and Harry will have a conversation with her in a cutscene. Dahlia interrupts the conversation with her typical crazy talk. She tells you to go to the Lighthouse on the lake, and the center of the Amusement Park. Cybil will check out the Amusement Park for you, and Harry will have to head to the Lighthouse. Dahlia also mentions you must use the Flauros, and then she leaves. Afterwards, you can find Handgun Bullets, Rifle Shells, a Health Drink, and a Save Point around the cabin. Leave the boat through the double doors to a different side. Now at the west side of the boat, go over the small wooden bridge to the pier and move up the steps ahead. There's a Romper up here and a Night Flutter patrolling the sky. Continuing south, head down the next set of stairs on the right side and cross over the longer wooden bridge. Follow the path through these red railings on this dock and head over the next wooden bridge to the pier again, and continue past the fence to the right to meet two Rompers. Just past that along the water at the right, follow the pier to the next stairs, and if you continue past that you can find a First Aid Kit guarded by two Night Flutters at the south end of that area. Head back from the dead-end and go up the stairs to the higher ground. Take the first left and head down the stairs, now going east directly towards the lighthouse. Follow the path to and up the next set of stairs to encounter three Wormheads. Finally, continue east and enter the Lighthouse through the door up the steps. Once inside, note the Save Point and head up the winding stairs with the wicked camera angle to the Lighthouse roof. Once up here, Harry realizes he's too late. You're free to fool around up here, though, and you can lose your character in the darkness in the area. Anyway, head back down the stairs in the lighthouse and exit back to outside. Starting your path through the labyrinth again, just step a few meters ahead and Harry will then be inside the boat, to save you a lot of time. Cybil is not back yet, so you better get to the Amusement Park. Go through the single door in the cabin and exit through the double doors at the stern. Move over the small wooden bridge back onto the pier and move up the stairs. Make minced meat out of the two Wormheads up the stairs, and head north to Sandford Street. Check your may and head for the red arrow at the west of your map, which you'll find is another Sewer opening. Once you reach the fenced off area, go through the partially opened gate and go down the ladder in the open manhole to the Sewers (connecting to the Amusment Park). |
13. Sewers (Connecting to Amusement Park)After entering the Sewers, a cutscene will play of Cybil, who doesn't have good fortunes. Back to Harry, grab the Sewer Map (Connecting to Amusement Park) on the wall and head off to the east. Shortly, you may notice three Hanged Scratchers on the roof, which you should take advantage of and shoot from a distance. Continue past them after disposal to reach a tunnel to the right. If you continue straight, however, you'll meet a dead-end with two more Scratchers on the roof, so that's obviously not necessary. Follow the tunnel to the west to encounter a Mumbler – that's one hell of a creepy sight, isn't it? It is quite strong and requires quite a lot of ammo kill. Moving on, you can find a Health Drink at the west end path, where the tunnel intersects with another route. To the south you can find a Health Drink and Handgun Bullets. Follow the north route to encounter two more Scratchers and Mumblers, unless you feel you can run past them – you might not feel too comfortable with all those enemies chasing you, though, so killing them isn't a bad idea. When you meet the west tunnel, take it to encounter another Mumbler not too far down. Past that, you'll hear a bang, followed by the clicking sounds of Scratchers walking behind you – don't stop, as if that sound wasn't enough to scare the hell of out you, and continue running for your life, navigating around the holes on the ground. You'll eventually reach a junction where the ground is completely gone, however, you can slip past by moving around the extremely narrow grating on either side – don't get get caught up here or those Scratchers are very likely to catch you. Continue past the missing ground area into an amusement park type area, and follow it to a ladder at the end and quickly go up it. If you get caught up at either side of the ladder and can't climb up it from your angle, the Scratchers are very likely to corner you and eat you up – so it is vital to approach this ladder at the right angle so you can safely climb up it right away. |
14. Lakeside Amusement ParkNow this area is quite confusing, and it's not terribly difficult to get lost. Follow the directions within carefully. Once up the ladder, move ahead into the open area. Follow the grating path off to the right to encounter a Larval Stalker again – it's been quite a while since you last saw once. Head past it and take a right afterwards. A Demon Child may come from the left, so you'd better take it out. Move past the pleasant- sounding carousel on the left side, and run over to the far left all the way to the end of the grating. Nearby, there's an ice cream stand, with a Save Point on the counter. There's a Demon Child somewhere around but that's not really a concern. Facing the ice cream stand, turn around and run straight, turning a bit to the right. Once you reach another Larval Stalker, as if these things are guiding you, continue a bit more to the right to find another one of these apparitions, falling down right near some steps. Head up the small steps and through the low gate, onto the carousel. In a cutscene, Harry meets Cybil in a wheelchair, but she doesn't seem like her normal self. She stands up and shoots at Harry. It's time to fight Cybil. Boss 4: Cybil
During the battle, Cybil has three attacks, only two in the first part of the battle, however. The first and most simple attack is a shot from her Handgun, which inflicts very serious damage – two shots from this will kill you no matter what health you have, so always heal to full health after being shot. And each time you're shot, you will be knocked straight to the ground, allowing Cybil to reload if she needs to. The other attack with her Handgun is a simple pistol whip when you're right in front of her. This doesn't inflict as much damage as a bullet, but it's still quite damaging. The last attack only takes place after Cybil drops her weapon, once she receives enough damage. This attack involves her grabbing you around your neck, and she tries to strangle you for quite a while without letting go. To escape the attack, wiggle the shoulder buttons and the direction pad buttons – if you let her strangle you for too long, it inflict heavy damage. As mentioned above, Cybil will drop her Handgun once she receives enough damage, and she feels like taking matters into her bare hands. From here on, the battle is very simple. First of all, if you picked up the Unknown Liquid with the Plastic Bottle in the hospital, you can use it on Cybil to cure here – it will expel the demon inside her. To use this liquid, run up to Cybil and use the Unknown Liquid from your inventory. If you use it, you'll get a better ending than if you don't, and if you don't use it or never even got it in the first place, you will have to kill Cybil and opt for a worse ending, although not much worse. So, if you have the Unknown Liquid, you can end the battle right now and save Cybil. If you don't have it, you'll have to keep fighting and kill Cybil. It's not hard at all to do, though, if you can allow yourself to do it. Since Cybil threw her weapon down, you can stay safely away from her and shoot her with the Rifle, or whichever firearm you chose. Repeat this and the battle will end. After the battle, if you saved Cybil, there will be a cutscene where Harry shares unknown information with Cybil, which is really quite interesting. After that, or if you didn't save Cybil, Harry will walk off somewhere else to find Alessa, and the "Flauros" will be used automatically. Shortly, Dahlia comes and then everyone, including you, seems to disappear with the powers of the Flauros. |
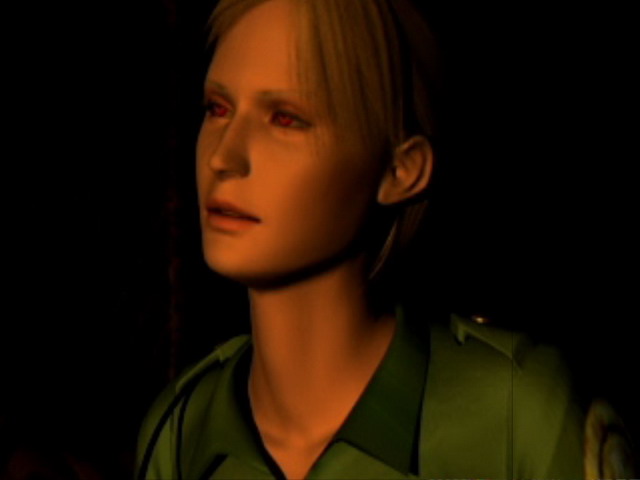
15. NowhereHarry awakens once again with Lisa in the hospital – what the hell is going on here!? Lisa talks to Harry for a bit and then leaves the room in anger. Something is giving Harry a headache – there's a sound coming from the basement. When you start, feel free to use the Save Point on the desk in the room. Although this really is the Examination Room of Alchemilla Hospital, this "place" you are in is not the hospital, and can only be described as "nowhere" – it's somewhat like a labyrinth; an abyss, if you will. Leave the room and followed the narrow walkway with the awesome camera angle to reach the elevator. Harry feels he's being summoned and takes the elevator down to a different level. Since this isn't truly the hospital, you have no map for this area and must rely on your sense of direction and memory. Inside the room on your left is a key stuck in the faucet, and in the right room is a key locked in a birdcage... Strange. The room directly across from the elevator bears the striking resemblance of the Antique Shop from earlier on, and you can find a Save Point on the desk inside. On a chair lies a First Aid Kit, and over on the shelf deeper in the room are Shotgun Shells. At the back of the room, there is no hole in the wall, so head back towards the door. Taking s look at the clock, Harry will notice that the hand of the clock is a key, but he can't get to it because it's closed off right now. There's also a square hole in the clock. Remember that and exit the room. Finally some enemies will appear in the corridor, one in front of you and another to the right – the Rifle should take care of them with one shot each. Although it's okay to use the Rifle in this area, you should probably switch to another weapon to conserve ammo for it, unless you have a lot of it. Save at least around 30 shells for now. As you probably already noticed, some doors in this hallway are locked and have words carved into them. In order to unlock those, you'll need to find the corresponding key. All other doors in the corridor are locked except for the last door on the right at the end of the corridor. Go through that door to the stairway and go through the door at the bottom of the stairs. Now in a classroom, take a look at the carvings in the desk in the middle of the room, and go through the other door. Inside on the table just ahead, you'll find a Screwdriver and a set of Pliers. You don't have a use for a Screwdriver just yet, but you do for the Pliers. Head back through the door to the classroom and reenter the stairway. Exit to the main corridor through the door atop the stairs and enter the room at the right side of the elevator (while facing the elevator). Use the Pliers from your inventory by the faucet to pull the key out. Pick up the Key of "Ophiel" from the ground afterwards. Exit the to hallway and find the door marked "Ophiel", which is the door to the right of the stairway. Use the Key of "Ophiel" to get through the door to the next corridor. Looking to the right, you'll notice a slate with names engraved on it, which was in the hospital earlier, and at the north end of the hallway you'll find an explanation which becomes a riddle. There's a keypad of letters by the locked east door, which is obtained from the puzzle. The Grim Reaper's ListThe first slate by the keypad will make no sense to you at first, so read the other slate at the other end of the hall:
Now that you've read that, take a look at the slate by the keypad, which should now make sense to you:
The key to this puzzle is explained in the second paragraph of the slate with the riddle on it, "Young and old lined up; In order of age." Looking at the slate with the names on it, you'll find a number beside each name, which is the age of the corresponding person. The idea of this puzzle is to arrange the five names in the order of their age, youngest to oldest. You should get the following:
Although not much is really accomplished by doing this at first, take a very close look at the names, in the order that they are. Notice anything strange? How about the spelling of "ALERT" down the list of the first letter of the first names? That word seems to be relevant to the situation here, and it matches the last part of the other slate, "Awaiting them, the frenzied; Uproar, the feast of death!" That's something that should be an alert to you. After determining the code, examine the crazy-looking keypad on the wall by the door and enter the code "ALERT" to unlock the door. Once the correct code for the puzzle has been entered into the keypad and the door unlocks, go through the door. Nothing is in the first room, so go through the other door to the next room. Up ahead on the wall is the Amulet of Solomon. Get it and retreat to the previous room, since nothing else is in here. Back in here, Harry will meet Lisa in a cutscene, and he'll force himself to leave to the main corridor. Afterwards, if you enter the room again, Lisa will be gone and you can read her diary on the ground. Back in the main corridor, the only other unlocked room is the one just ahead of Harry to the right (second room on the left side moving north up the hallway). Inside this room is a square stone on the large object ahead, and to get that stone you'll need to solve another puzzle. Astrology (Zodiac) PuzzleThis is by far the most difficult puzzle in the game and requires tremendous thinking to discover how to do it on your own. The first and foremost aspect of this puzzle, which is the hardest, is to discover what the astrological symbols on the wall are trying to show you. Firstly, you'll find four astrological symbols on the left and right walls – two on each side – and three on the large pillar deep in the room. Checking all sides of the pillar, each of the three sides has a keypad under its astrological symbol. For each of these keypads, only one number can be inputted. Finally, there is a square stone depressed in the center of the pillar, which seems to be the reason why you're solving this puzzle. Let's take a look at the symbols on the walls and numbers underneath: Then there are three symbols on the pillar with keypads: So what do these numbers mean? That is the question. It is very difficult to come up with this on your own, but if you examine each symbol relating to the number, you can ultimately determine that the number represents the number of limbs in the symbol. Libra, a scale, is not human but has two "arms" if you will. Pisces, a fish, has no limbs. Aries, a ram, has four limbs (four legs). Cancer, a crab, has ten limbs (eight legs and two arms). Scorpio, a scorpion has eleven limbs (eight legs, two arms, and a tail), and may be a bit more confusing. Therefore, you should be able to come up with the following numbers for the symbols on the pillar:
So now you've determined the numbers for each keypad on the pillar. Under Sagittarius on the left, push 6, under Taurus in the middle, push 4, and under Gemini on the right, push 8. So essentially, the code is 6, 4, 8, although between the three keypads combined. After inputting the correct number for each keypad, the square stone will fall down from the astrological pillar. Once you complete the puzzle and the stone falls on the ground, pick up the Stone of Time and leave the room. Now you will encounter Nurses in this corridor, but you can quickly go back through the door at the close end of the longer hallway to return to the main corridor. There will be another Nurse in here, right to the left of you. Enter the last room on the left in this corridor before taking the corner, which is the Antique Shop. Now back in here, insert the Stone of Time into the square depression in the grandfather clock. The clock sounds five times, meaning it's five o'clock, and the glass of the clockface shatters in Harry's face. Grab the Key of "Hagith" from the clockface and exit the room. Face to the right and go through the double doors at the end of the hallway, using the Key of "Hagith". Pop a cap in the Nurse in your face and enter the elevator. Ride up to 2F and head through the double doors into the first corridor. You'll be able to hear Nurses ahead of you in here, and you can just barely them. If you have the Rifle ammo to spare, you can snipe the Nurses without moving at all at first. Go through the third door on your left and grab the Crest of Mercury inside the smashed display case and the Rifle Shells on the table in the corner. Deeper in the room, be sure to grab the extremely important Ring of Contract in another smashed display case – this ring will save your life if you know when to use it, so don't be careless. Leave the room to encounter another Nurse in the corridor. Moving on, head through the double doors around the corner just ahead. Put the Nurse in front of you out of her misery. Check the door directly across from the double doors, you will unlock it, and that's how you get back to the other corridor on 1F (yes, you do transport to downstairs, but this is nowhere – what do you expect?). Don't bother going through the door just yet, and enter the small room on the right side of the hallway, near the double doors. Inside this room, grab the Handgun Bullets on the table to your right and the Camera. Exit the room. Two more Nurses linger down the hallway, and in the last room on the far left of the hallway, you'll find a use for your Screwdriver. There's a steel plate screwed onto the wall in the room, just as there was in the hospital. Use your Screwdriver to remove the steel plate, since you don't want that, to discover a key behind it. However, you cannot take the key just yet – electricity is flowing through it, and if Harry touches it he'll be shocked. You'll need to turn off the generator in the basement in order to get this key. Leave the room. Now it's time to check 3F, so head for the elevator. You can either pass through the previous corridor on this floor and enter it from there, or you can go through the door at the beginning of the longer hall to be transported down to 1F and use the elevator from there after passing through the door of Hagith. Either way, head up to 3F via the elevator. The reason you're not going to the basement just yet is because there is no button for it on the elevator panel, in case you were wondering. Now on 3F, take a look at the altar and the two paintings ahead of you. It's time for another short puzzle. The "Light" PuzzleThe altar really isn't much of interest here but the paintings on the sides of it and the two strange doors on the sides of the room. If you examine the paintings you'll read a description for them:
You'll notice the word "light" in both the descriptions, so the idea seems to be exposing light to the pictures. Checking your inventory for any items, you have a flash camera which will shine bright light before taking a picture, although you won't care about the pictures – just the light. Use the Camera on both paintings while facing them individually to expose white line shapes in the paintings, which show up as follows: Now that you've brought out those shapes, take another look at the strange keypads on the doors on each side of the room. You'll find three dot keypads on each door. Thinking about it, that looks very similar to the format of the shapes in the paintings, and the idea of this puzzle is to match the shapes in the painting on each side of the room with the keypad on the door on the same side of the room. When you press one of the dots on the keypads it is pushed in, and it turns dark. Take a look at the painting on each side of the room and enter the shapes in each small dot keypads, and you should come up with the following solution for each side respectively: Once you've inputted the correct "code" into each door, it will unlock. After the codes for each door have been inputted and are unlocked, start to search the rooms. The room on the left, when facing the altar, contains the Bird Cage Key, and the room on the right bears a Health Drink and a botanical book about White Claudia, which sometimes you can and sometimes you can't read, for some odd reason. Return to the elevator and head back down to the first floor. Go through the double doors and around the corner at the end of the hallway. Enter the room on the left, facing the dysfunctional elevator. Go up to the birdcage in here and use the Bird Cage Key to get the Key of "Phaleg". Bird wings are heard flapping, but there's not a bird in sight to support this. Leave the room and use the Key of "Phaleg" to pass through the door of Phaleg, the next door on the same side of the hallway. Just through the door you'll hear child whimpering sounds, indicating the presence of Demon Children. However, these aren't normal Demon Children – they're invisible! Well, actually, you can see their black shadows, but they're very hard to see in these dark hallway. Keep your eyes open and kill the Demon Children as they walk towards you, and then enter the first room on your right. There seems to be suspicious placement of objects in this room, and one might wonder why there's so much open space in front of the fridge. Examine the suspicious fridge for Harry to notice a missing link in the chain, and there's a dagger until it which seems to be holding the fridge shut. Grab the Dagger of Melchior, but don't be greedy and careless. That dagger was there for a reason, and I'm sure you don't want to find out the hard way what that reason is. After taking the dagger, use the Ring of Contract, which Harry notices is a hefty ring, to complete the missing link in the chain. After attaching the ring, turn around and head for the door. A banging sound is heard from behind Harry – something is in the fridge! Good thing you attached that ring... If you didn't use the ring and tried to leave the room like a greedy bastard, you will be punished for your wrongdoing. Since nothing will be keeping the fridge shut without the ring, instead of just hanging, the monster in the fridge will bang the door open, grabbing Harry by his leg and killing him. That's what greed gets you. Anyway, leave the room after everything is all good. Back in the dark corridor, another invisible Demon Child will appear (well, it won't actually "appear" if you want to get technical, however its shadow is still there). If you check some of the other rooms in this corridor, you'll notice that they have names like the doors in the previous corridor. Moving on, the next door on the right side of the hall contains Handgun Bullets, and Health Drink, and a bag of jellybeans! Unfortunately, you can't eat these babies. Harry wonders if he should open the bag. Decide to rip open the bag, and Harry furiously tears open the bag like it owed him child support, causing the jellybeans to go flying in all directions. If you're wondering, no, that wasn't pointless. Check the floor and pick up the Key of "Bethor". Pass through the other door in the room as you're still laughing at Harry's actions. You find yourself in a familiar room from the hospital with a VCR. If you tried to view the Video Tape back in the hospital, it was all static. Insert the Video Tape in the VCR this time and it will play fine. After viewing, leave both rooms to the hallway. Enter the room directly in front of you after exiting to the hallway and grab the Ankh on the wall after the short cutscene. Leave the room. The last door at the end of the hallway is a child's room, and there are five depressions of different shapes on the other door in the room. Some of the required items you already have, but you still need one more, so there's no real need of going in there just yet. Head back down the hallway and enter the last room on the right, using the Key of "Bethor". This is the Generator Room – turn off the generator, remembering the electrostatic key on the second floor. Turning off the generator will disable the elevators, but there is a door in main corridor of 1F that transports you to 2F. After disabling the generator, leave the room and exit back to the main corridor of nowhere through the right door. Following the right wall, go through the second door on the right to be transported to 2F. Up on the second floor, dispose of the three invisible Demon Children and enter the last room on the left side of the hall. Inside, check the far wall and take the Key of "Aratron", now that electricity isn't flowing through it anymore. Exit the room to find more invisible Demon Children, one on each side of you. Plow through them and return to 1F through the last door on the right side of the hall, moving back down the corridor. There are more invisible Demon Children is this corridor as well, but they aren't in your way. Turn to the left and go through the door of Phaleg in front of you. No enemies are in here this time – run down the dark hallway and enter the last room on the right, using the Key of "Aratron". Harry enjoys a cutscene of the ghosts of Dahlia, Kaufmann, and other people, over Alessa in her sickbed. Afterwards, grab the Disc of Ouroboros on the computer panel by Alessa's picture. Leave the room and enter the child's room across the hall, which is Alessa's bedroom. Entering the room, there's a Save Point on the desk ahead, which you should definitely take note of and save your game. Now that you have all "five rites", as mentioned on the locked door ahead, insert the five specific items into the door. Use the Amulet of Solomon, Crest of Mercury, Ankh, Dagger of Melchior, and the Disc of ouroboros to unlock the door. Save your game before you leave this room! When you're ready, go through the door for a cutscene. After the strange ghost scene, follow the path around the bend and go down the stairs into the darkness. A cutscene will play in an allocated area, and Harry arrives shortly. This cutscene will be slightly different based on your previous actions in the game, but I won't mention anything specific. After the cutscene, it's time to fight the final boss. Just like the cutscene, the boss you're about to fight may be different depending on what you have done in the game. Boss 5: Incubus / IncubatorIf you spent time in the Silent Hill Resort Area investigating the area, saving Kaufmann and following up with everything else, ultimately triggering the cutscene with Kaufmann all pissed about the glass vial from the motorcycle, then you will fight the Incubus, which is a extremely large and truly evil-looking demon with wings. If you didn't do all that, or didn't even save Kaufmann, meaning you did not trigger the scene with Kaufmann and the glass vial, you will fight the Incubator, which is a little girl dressed in white, bearing striking brightness. Use the strategy below for the specific boss you are facing. Incubus
Honestly, the best strategy for this fight is to just stand exactly when you are and unload shots into the demon until it falls down dead. You will receive a lightning shock several times, but it's impossible to avoid even if you're running at full speed (on Hard). The trick, however, is to heal the exact moment you are striken – if you just stand there and take the attacks without healing, you will die. So, if you have enough health items, you'll be fine. The Incubus only has one attack, which is striking you with red lightning charges, inflicting maximum damage, which will certainly kill you if you do not heal within the second. Each time the demon strikes you with its lightning, it will perform several strikes in a row. But as long as you heal within the first second you're touched, no more damage will be inflicted. The warning of the lightning charges is a hint of the red lightning seen flashing before it performs the attack. You can't avoid the attack so it's not to important, although you should be prepared to hit Select and heal when you see this. As mentioned, start off with the Hunting Rifle and unload 6 shots into the flying demon. You will then be struck by lightning – the second it touches you, enter your inventory and heal to full health. If you wait more than a second after impact, you will die. After returning to the game, you will continue to be struck by the lightning bolts, but because you already healed you won't take any more damage from the current attack. You may think you're about to die, but if you already healed after the first strike it you, you will not die or even take any more damage. Once the several lightning attacks are finished, ready your Rifle again and unload 6 more shots, just in time before the demon strikes you again. Once again, enter your inventory the second it touches you and heal to full health. Repeat this strategy, and after 24 rifle shots, the demon will fall down dead and the battle will be over. Incubator
Just like the Incubus, the Incubator has the same attacks – the only difference is the colour of the lightning bolts, which are blue instead of red. For the attack, the Incubator will strike you with it's lighting for around five seconds, and you must heal within the first second of the attack or you will die. Once you've healed once during the attack, you're fine for the rest of the attack, even the the lighting continues to hit you. After around 18 shots on Hard, you will defeat the Incubator and the battle will be over. After defeating the final boss, congratulations on completing Silent Hill! Enjoy your ending, the credits, and the bloopers. |

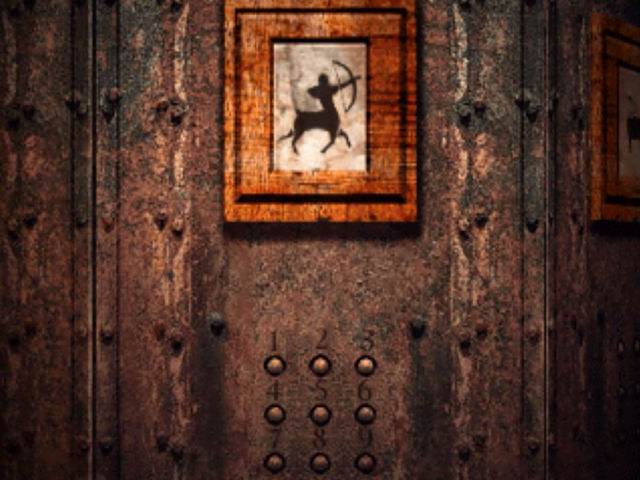

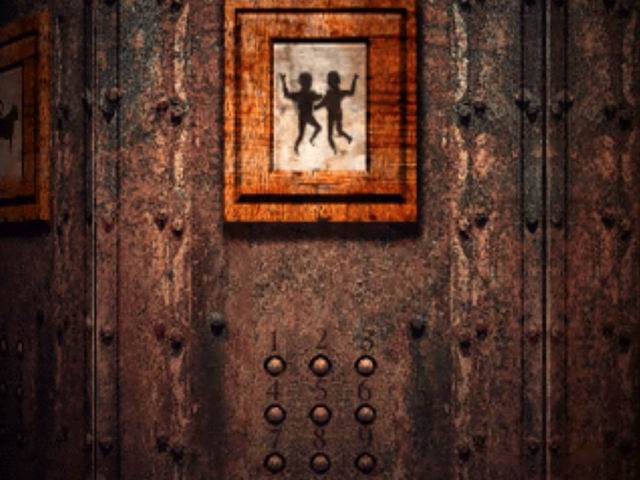
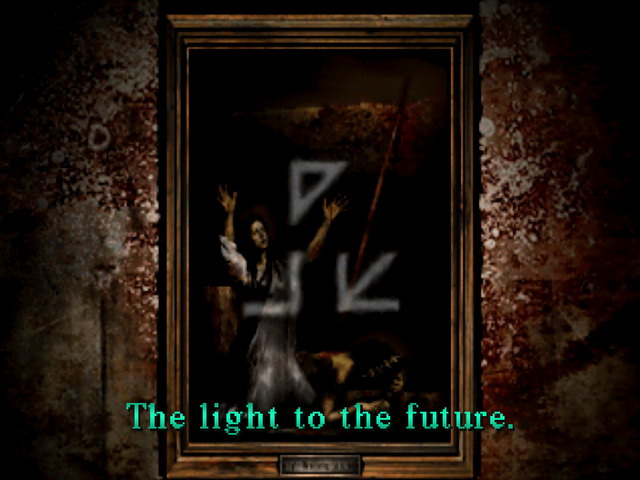
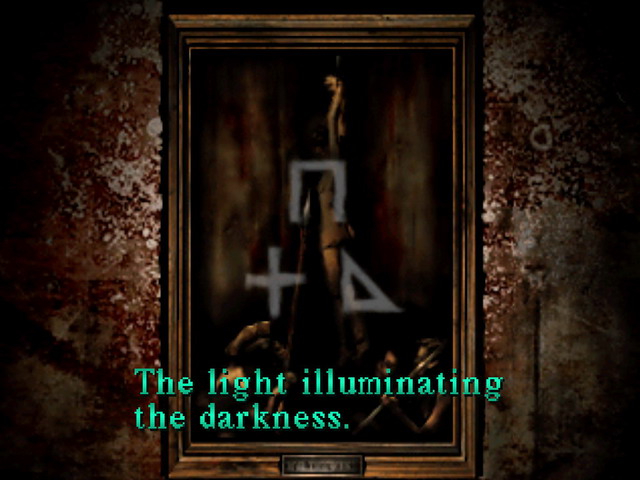
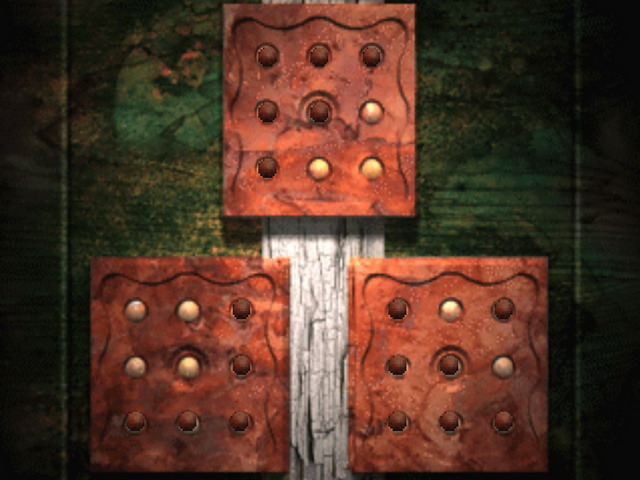
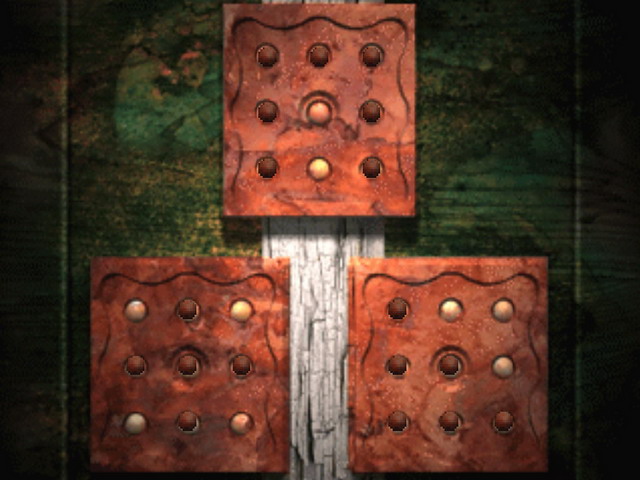
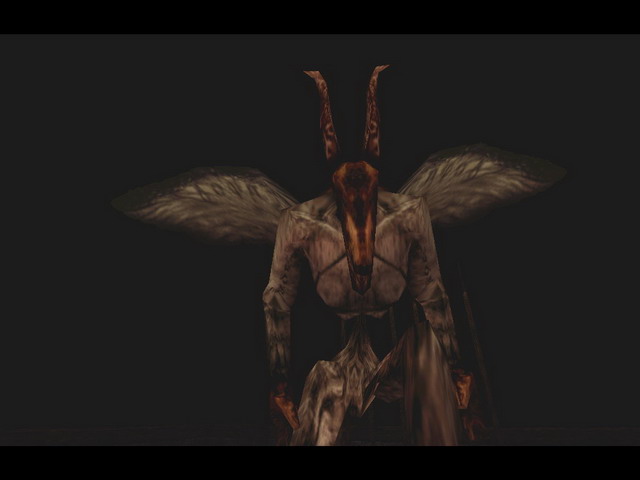
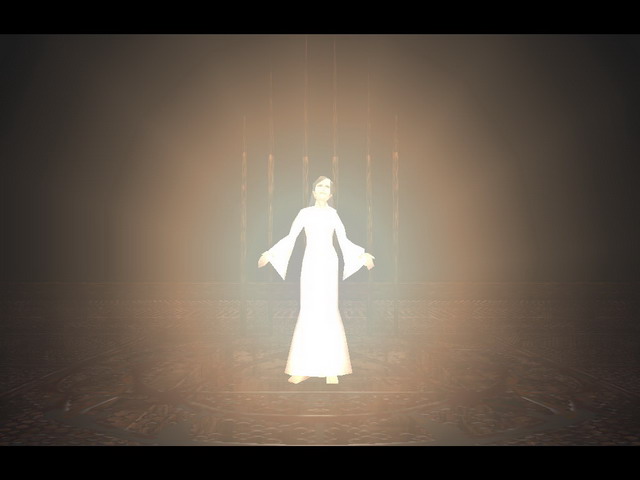
0 Komentar